Why Vinyl Plank Floors Buckle on Concrete Slabs
Vinyl plank buckling after foundation work? Learn the real causes, how moisture testing works, and your best repair options for glue-down floors on concrete slabs.
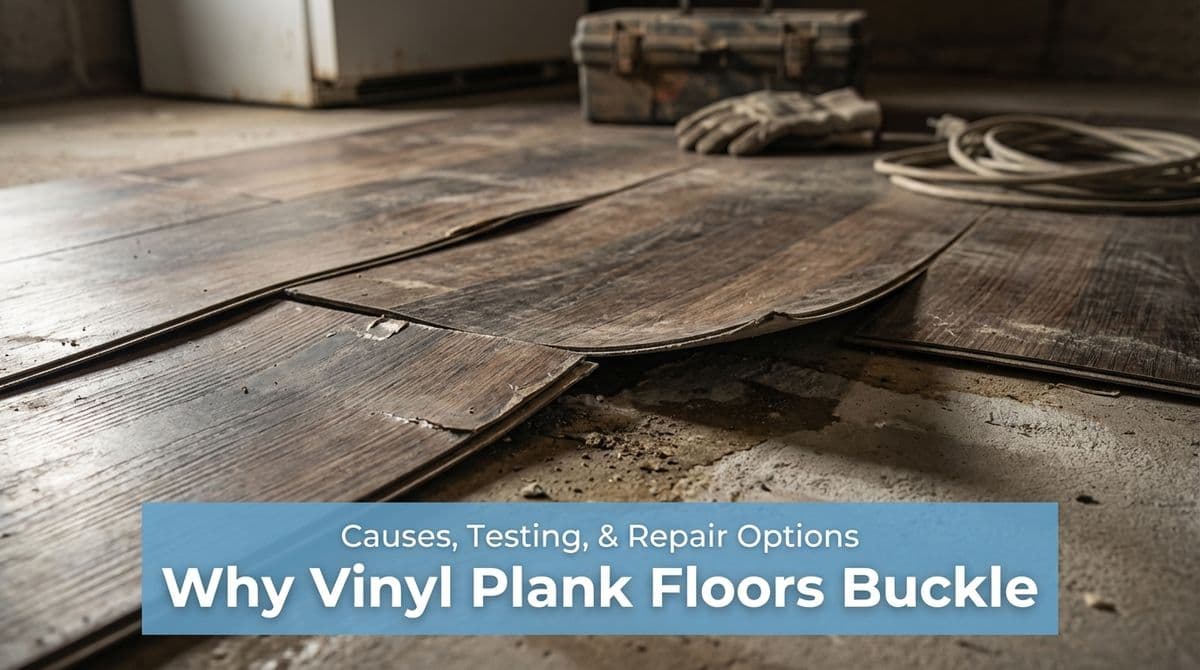
When Vinyl Plank Floors Buckle After Foundation Work
We recently got a call from a homeowner — we’ll call her Linda — who had commercial-grade vinyl plank flooring installed in her house about 10–11 years ago. She’d just had foundation work done, and after the crew lifted and adjusted the slab, a line of planks in her family room suddenly popped up.
Her floor was glued-down vinyl plank over concrete, and she still had one extra box of the original product. She wanted to know: could we just shoot some glue under the loose planks, press them back down, and call it good — or did this mean a bigger repair?
That conversation is one we have a lot, especially in homes built on concrete slabs or after foundation repairs. So we thought we’d walk through what’s usually going on in a situation like Linda’s, how we approach diagnosing it, and what realistic repair options homeowners have.
Why Vinyl Plank Floors Buckle on Concrete Slabs
When glued-down vinyl plank starts to bubble or tent along a line, there are usually a few common culprits working alone or together:
- Foundation movement – When a slab is lifted or settles over time, it can create subtle ridges or high spots. A line of planks sitting on a raised area will often pop loose first.
- Moisture coming through the concrete – Concrete is porous. If moisture vapor emission is too high and wasn’t tested or mitigated before installation, glue can soften or fail over time, leading to buckling.
- Adhesive issues – Wrong type of adhesive, improper trowel size, not enough open time, or simply old, degraded glue can all lead to loss of bond.
- Temperature and expansion – Less common with glued-down commercial vinyl than with floating floors, but in some cases, lack of expansion space at walls or transitions can add stress.
In Linda’s case, the buckling appeared in a fairly straight line about 6–8 feet long, with one or two planks in each row popped up over a concrete slab. That pattern often points to either a high ridge in the slab (from movement or repair) or a moisture problem along a crack or seam in the foundation.
Why Moisture Testing Matters Before New Floors Go In
Any time we install new flooring over concrete — especially vinyl, laminate, or engineered wood — we start by checking the slab’s moisture. That’s not just good practice; it’s what most manufacturers require for their warranties.
For homeowners, here’s what we’re looking at:
- Moisture vapor emission rate (MVER) – How much moisture is moving through the slab over time.
- Relative humidity in the concrete – Measured with in-slab probes or other professional tools.
- Visible signs – Dark spots, efflorescence (white, chalky residue), or dampness are big red flags.
If those numbers are too high and we ignore them, a “perfect-looking” new floor can start buckling in as little as six months to a year. That’s why, in calls like Linda’s, we’ll often say we can’t really tell you what’s going on until we’ve pulled a plank or two and tested the slab underneath.
Can Buckled Vinyl Plank Be Glued Back Down?
Linda’s first question was one we hear all the time: could we just inject some glue under the bubbled planks, press them flat, and avoid replacing anything?
Sometimes the answer is yes — but only in very specific situations:
- The slab underneath is flat, dry, and sound.
- The original planks are not warped, cracked, or stretched.
- The adhesive failure is small and localized (for example, where something heavy scraped the floor).
In many foundation-related cases, though, simply squirting glue under a bubble is a band-aid. If the problem is moisture or a raised ridge in the concrete, that stress is still there. The planks may flatten for a while and then pop up again — sometimes worse than before.
Step-by-Step: How We Diagnose a Buckling Vinyl Floor
When we come out for a free consultation, like we scheduled with Linda, here’s typically how we approach it:
- Inspect the pattern – We note whether the buckling follows a straight line, a crack, a doorway, or a particular area (like near exterior walls or plumbing).
- Lift a suspect plank – Carefully removing one or two damaged planks tells us a lot: we can check how well the glue bonded, see any slab cracks, and assess slab flatness.
- Test the moisture – We use appropriate tools to measure moisture levels in the concrete where the problem is worst.
- Check remaining material – We look at any extra boxes the homeowner has to see if we have enough matching planks for a proper repair.
Only after we’ve done these steps can we confidently say whether a quick repair is reasonable or if the issue points to a larger underlying problem.
Repair Options for Homeowners
Once we’ve figured out what’s going on, we usually walk homeowners through a few common options:
1. Localized Plank Replacement
If the slab is sound and dry, and there’s no continuing movement, we can often:
- Remove the affected planks along the problem line.
- Scrape and clean any failed adhesive.
- Level minor high or low spots if needed.
- Reinstall new planks using a proper vinyl plank adhesive.
This is where having extra material, like Linda’s single box, really helps. The catch is color and pattern changes over the years — even if the product name still exists, manufacturers update lines frequently, so a perfect match isn’t always possible.
2. Partial Area Re-Flooring
If you don’t have enough matching planks, or the pattern has changed over the years, we might:
- Redesign a section (for example, just the family room) with a new, intentionally different floor.
- Add a transition strip between old and new flooring to make it look like a planned choice rather than a patch.
This can be a good compromise when a small repair isn’t practical but a full-house replacement isn’t in the budget.
3. Addressing Moisture or Slab Issues First
If moisture levels are too high or the slab is visibly uneven from foundation movement, we’ll usually recommend:
- Moisture mitigation products or sealers designed for concrete under resilient flooring.
- Grinding high spots or using patch/leveling compounds where appropriate.
- In severe cases, involving a foundation or concrete specialist again before reinstalling floors.
Skipping this step and just replacing planks almost always leads to the same problem returning.
Choosing the Right Adhesive (It Doesn’t Have to Match the Brand)
Linda mentioned that her original flooring brand sold its own glue and wondered if we had to use that exact adhesive again. Manufacturers often offer “house brand” adhesives, but you don’t always have to use their specific label.
What matters most is:
- The adhesive is rated for vinyl plank or LVT/LVP.
- It’s suitable for gluedown over concrete slabs.
- It meets the moisture limits of your slab (some adhesives are more moisture-tolerant than others).
We match the adhesive to the product type and site conditions, not just the brand name on the box.
When to Call a Flooring Pro
If you see a straight line of buckling planks after foundation work, or you know your home is on a concrete slab and your vinyl is suddenly bubbling, it’s worth having a professional come take a look.
We’re always happy to come out, inspect the floor, test moisture, pull a plank or two if needed, and give an honest opinion and estimate. Sometimes it’s a simple, localized fix; other times, the floor is warning you about a bigger issue underneath. Either way, catching it early gives you more options — and usually saves money in the long run.