Installing LVT Over Mixed Surfaces: Prep & Leveling Guide
Planning to float LVT over tile, hardwood, and uneven spots? Learn how leveling, prep, and professional installation affect cost, quality, and longevity.
Installing LVT Over Mixed Surfaces: A Real-World Project
We recently got a call from a homeowner — let’s call her Emily — who was planning a big flooring project. She had around 2,500–2,800 square feet of luxury vinyl tile (LVT) ready to go. The carpet was already pulled up, the trim was removed, and she wanted the new LVT to float over a mix of existing floors: part tile, part hardwood, and one room that clearly needed leveling.
Emily’s main questions sounded a lot like what we hear every week:
- Can you float LVT over tile and hardwood?
- What kind of leveling and prep work is really needed?
- What does installation pricing usually include?
We’ll use Emily’s situation as a guide to walk through what homeowners should know before installing LVT over mixed surfaces.
What a “Floating” LVT Floor Really Means
When Emily told us, “We’ve got carpet pulled out and we want to float the rest,” we knew she was planning a typical modern LVT install. A floating floor isn’t glued or nailed down; instead, the planks lock together and “float” over the subfloor or existing hard surface.
Floating LVT has a lot of advantages:
- Faster installation – no full-spread glue to cure.
- Easier repairs – damaged planks can often be replaced individually.
- Less demolition – in many cases, we can go right over existing tile or hardwood.
But floating doesn’t mean “no prep.” The floor underneath still has to meet the manufacturer’s requirements, or you risk gaps, clicks, movement, and even warranty issues.
Covering Tile, Hardwood, and Bare Subfloor with LVT
In Emily’s home, about half the area was tile and half was hardwood, with one room that needed leveling. That’s a pretty common mix in larger remodels. Here’s how we generally look at each surface.
Floating LVT Over Existing Tile
Good news first: you can usually float LVT over tile if the tile is:
- Firmly attached (no hollow sounds or loose tiles)
- Relatively flat with no major lippage (height differences between tiles)
- Clean and dry
We often have to address the grout lines. If they’re deep or uneven, we’ll use a patching or leveling compound to fill and smooth them so they don’t telegraph through the LVT over time.
Homeowner tip: Walk barefoot across the tile. If you feel sharp edges or big dips at grout joints, expect some patching to be needed.
Floating LVT Over Existing Hardwood
Hardwood can also be a good base for floating LVT, but it comes with its own checklist. Before we float over hardwood, we want to see that it is:
- Securely fastened (no excessive squeaks or movement)
- Relatively flat, with no major cupping or crowning
- Dry and free of active moisture problems
If boards are loose, we may need to re-fasten them. If they’re badly cupped or heaving, more extensive prep or even removal might be necessary.
Homeowner tip: If you can feel the hardwood move under your feet, or see big waves when you look across the floor at eye level, mention that when you call for an estimate.
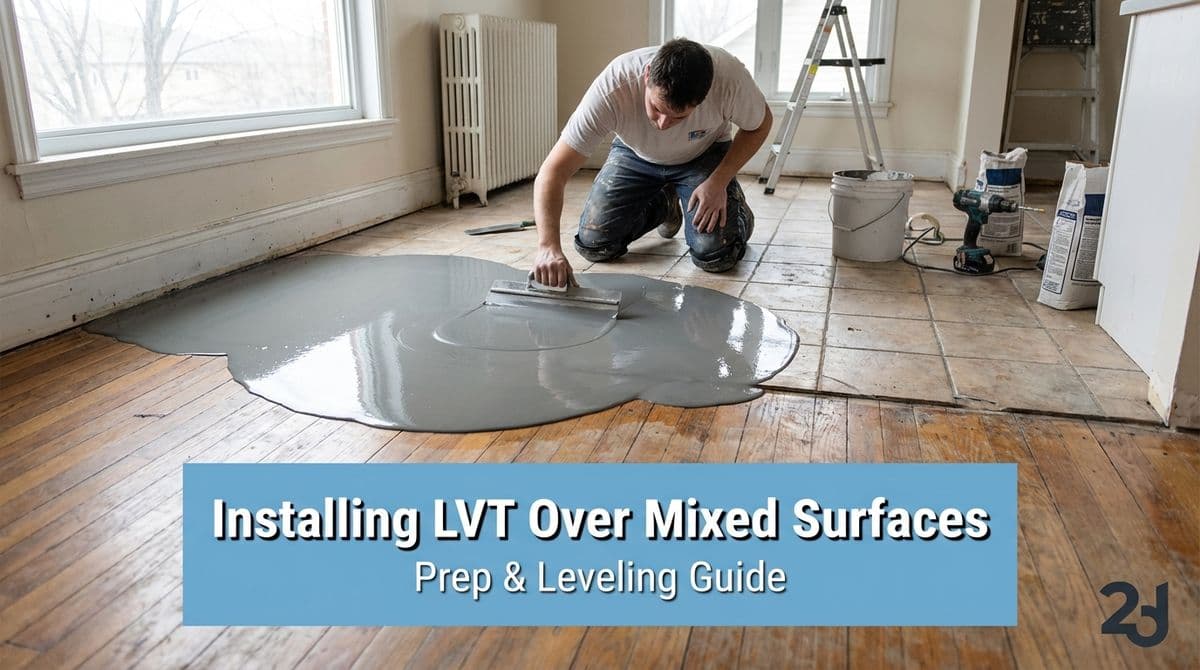
Why Leveling and Flatness Matter So Much
One of Emily’s rooms “would need to be leveled,” as she put it. That’s another thing we see often: one area that dips or crowns more than the rest. Most LVT manufacturers require the floor to be flat within about 3/16" over 10 feet (or something similar — the exact spec varies by brand).
That doesn’t mean every room has to be perfectly level like a pool table, but it does need to be flat. When the floor isn’t flat, floating LVT can:
- Flex and make noise when you walk
- Separate at the joints over time
- Wear out faster in the low or high spots
To fix that, we use patching/leveling compounds to fill low spots or ease high spots. On Emily’s project, we talked about including the patching compound as part of the install cost, the same way we normally do when we’re handling the full prep.
What Professional LVT Installation Pricing Usually Includes
Emily had already pulled the carpet and removed the trim, and she was supplying her own LVT. Her question to us was simple: “What do you charge, and what all do you do?”
For a full-service job, our pricing per square foot typically includes:
- Carpet and pad removal
- Basic floor prep (scraping, cleaning, minor patching)
- Patching compound for modest leveling needs
- Floating LVT installation according to manufacturer specs
Because Emily had already done some of that prep and was providing the material, we were able to offer a lower labor-only rate. That’s something we’re happy to do when homeowners handle part of the work themselves.
Homeowner tip: When you call for quotes, tell the installer:
- Approximate square footage
- What’s on the floor now (carpet, tile, hardwood, concrete)
- Who is providing the LVT and underlayment
- Whether you’ve already removed trim, doors, or carpet
The more details you share up front, the more accurate your initial quote will be.
Why a Walkthrough Is Still Important
Even after giving Emily a ballpark over the phone, we offered to walk the job before locking in anything. That’s always our recommendation for larger projects — especially when we’re floating over mixed surfaces.
During a walkthrough, we can:
- Check the flatness of the tile and hardwood
- Identify any loose or hollow areas
- Confirm how much leveling is truly needed
- Look at door clearances and transitions between rooms
That visit protects both you and us: you get a clearer picture of the real scope and cost, and we can plan the right materials, crew size, and time frame.
Getting Your LVT Project Ready for Installation
If you’re in a similar situation to Emily, here’s a simple checklist to get your home ready for a floating LVT install over mixed surfaces:
- Decide whether you want to keep existing tile and hardwood or remove them.
- Pull carpet and tack strips (or ask us to include it in the quote).
- Remove baseboards and label them if you plan to reuse.
- Vacuum and sweep thoroughly after any demolition.
- Note any “problem rooms” where the floor feels uneven.
- Have your LVT, underlayment, and transitions on-site before install day if you’re supplying materials.
Floating LVT over mixed surfaces can absolutely be done and look fantastic when the prep is right. If you have a project with tile, hardwood, and a few uneven spots mixed in, we’re happy to walk through it with you and recommend the best path forward.