How to Fix a Damaged Luxury Vinyl Plank Board
Got a chipped luxury vinyl plank that filler won’t hide? Learn when you can spot-repair LVP, when to replace the whole board, and what to expect from a pro repair visit.
When That “One Little Chip” in Your LVP Won’t Disappear
We recently got a call from a homeowner — let’s call him Frank — who had brand new luxury vinyl plank (LVP) flooring. Everything looked great… except for one plank by the back door.
Frank told us he’d noticed a chipped end on that board after the install. Instead of replacing the plank, someone tried to fix it with putty. At first it looked okay, but within a short time that pale chip turned into a dark, obvious spot that stood out every time he walked past the door. Now he was worried that replacing the damaged board might mess up the surrounding flooring.
We hear this story a lot, so we figured we’d walk you through what we explained to Frank: when a spot-repair might work, when you really need to replace the whole plank, and what to expect when a pro comes out to swap a single board without wrecking the rest of your floor.
Why Fillers and Putty Usually Fail on LVP Chips
Luxury vinyl isn’t like wood. When you chip it, you’re usually damaging the printed wear layer and exposing the material below. That damage often has depth and texture, not just color loss.
Here’s why putty and fillers rarely look good for long on LVP:
- Color mismatch: LVP patterns are printed films with shading, knots, and grain. A single solid-color filler almost never matches.
- Texture difference: The top of LVP has a specific sheen and texture. Putty tends to dry dull or too shiny, and you can feel the patch with your foot.
- Movement and flex: Floors flex slightly when you walk on them. Most fillers are hard and brittle; they crack, crumble, or darken as they collect dirt over time.
- Moisture and cleaning: Mopping and cleaners can stain or wash out filler, turning a light chip into a dark, dirty spot — exactly what happened to Frank.
There are specialty repair kits that can help camouflage tiny surface scratches or pinholes, but once you have a noticeable chip on an edge or corner, the most reliable fix is usually to replace the whole plank.
When You Can Spot-Repair vs. When to Replace the Board
Not every mark on LVP needs a full plank replacement. Here’s a simple way we talk homeowners through it:
Spot-repair is sometimes okay when:
- The damage is very shallow (a light scratch in the top layer, not a gouge).
- The area is small (think pen-tip to pencil-eraser size).
- It’s in a low-visibility area — behind a door, under furniture, inside a closet.
- You’re comfortable with a minor cosmetic fix that may not be completely invisible.
Replace the whole plank when:
- There’s a chip or chunk missing, especially on the end or side of a board.
- The damage is in a high-visibility area — entries, hallways, kitchens, near doors.
- The filler attempt is now discolored, cracked, or catching dirt.
- The damaged edge is near a door, sliding door, or transition strip where moisture and traffic are high.
In Frank’s case, he had a chipped end by the back door with a failed filler job. That checked all the boxes for a full plank replacement.
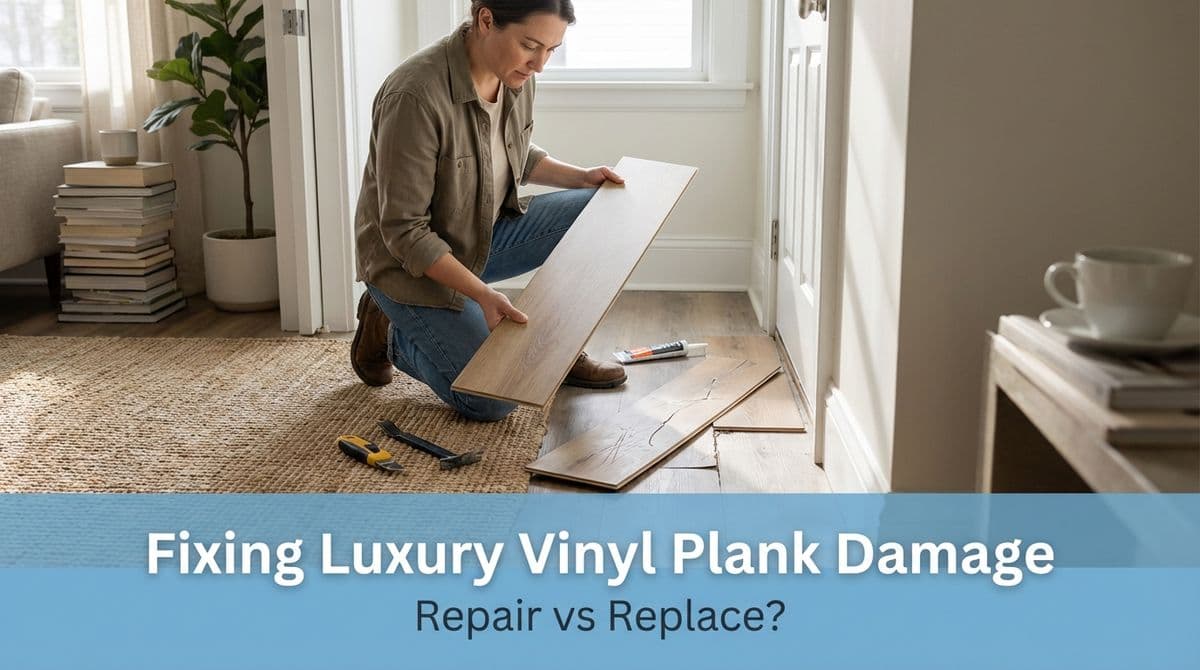
How Pros Safely Replace a Single Luxury Vinyl Plank
One of Frank’s biggest concerns was, “If you take out that one piece, are you going to mess up the others around it?” The good news: a careful pro can replace a single board — especially near a wall, doorway, or edge — with minimal disruption if the floor is in good shape.
The exact method depends on how the floor was installed (floating click-together, glued down, etc.), but here’s the general process we walk through.
1. Inspect and choose the safest approach
When we arrive, we first inspect:
- Type and brand of LVP (click-lock, glue-down, loose lay).
- Location of the damaged plank (by a wall, in the middle of the room, at a doorway).
- How the boards are locking together and which direction they run.
Near a back door or wall, we often have the option to unlock boards from the edge rather than surgically cutting just one plank out of the middle of the floor.
2. Edge or door-area replacement
For damage close to a door or along the edge of the room, a common pro technique is:
- Carefully remove the baseboard or door trim if needed.
- Unlock and lift the planks starting from the edge until we reach the damaged piece.
- Swap the damaged board with a new, matching plank you provide.
- Reinstall the surrounding boards in the same pattern and lock them back together.
- Reinstall trim, leaving the proper expansion gap hidden underneath.
Done correctly, this method doesn’t damage the neighboring boards and leaves the floor looking like the damage never happened.
3. Surgical cut-and-replace (when needed)
When the damage is in the middle of a room or the floor can’t be unlocked from an edge, we may use a more advanced “surgical” method:
- Score and cut the damaged plank into sections with a specialty saw or knife.
- Remove the pieces without prying against the neighboring boards.
- Modify the replacement plank’s locking edges as needed so it can be dropped in and secured with adhesive.
This is trickier and not something we recommend as a first-time DIY project — one bad cut can damage a second or third plank, turning a simple repair into a small remodel.
What You Should Have Ready Before a Repair Visit
Like we told Frank on the phone, we can repair most LVP damage as long as you have extra planks. Here’s what helps a repair go smoothly:
- Extra matching planks: Ideally from the original installation — same brand, color, thickness, and locking profile.
- Any leftover boxes or labels: These help us confirm exact product details.
- Clear access to the area: Move small furniture, rugs, and anything blocking the damaged plank.
- Photos, if possible: If you text us pictures ahead of time, we can often confirm whether it’s a plank-replacement situation before we arrive.
If you don’t have spare boards, we can help you track them down, but matching discontinued lines can be challenging — another reason to always keep a few extra pieces after your initial install.
DIY vs. Hiring a Pro: Cost, Risk, and When It’s Worth It
Homeowners often ask whether they should attempt a DIY repair to save money. Here’s how we usually break it down.
DIY touch-up
- Good for: Small surface scratches and scuffs.
- Tools: LVP repair kit, color markers, or wax sticks (usually $15–$40).
- Risk: Low, as long as you don’t start cutting planks or prying edges.
DIY plank replacement
- Good for: Experienced DIYers with the right tools who don’t mind risk.
- Tools: Oscillating saw, fine-tooth blade, straightedge, pull bar, tapping block, and quality adhesive if doing a surgical replacement.
- Typical cost: $50–$150 in tools and supplies if you don’t already own them.
- Risk: Moderate to high — you can easily damage adjacent planks or void your floor’s warranty.
Hiring a pro
- Good for: Chipped edges, multiple boards, or damage in high-visibility areas.
- Typical cost range: Often in the $150–$350 range for a small, single-plank repair, depending on access, method, and your local market.
- Benefits: Lower risk of additional damage, cleaner finish, and a repair that blends in with the existing floor.
In many cases, by the time you buy tools and potentially sacrifice a couple of extra planks learning the technique, hiring a pro ends up being the more economical and less stressful option.
How to Prevent Chips and Damage in the First Place
While accidents happen, a few simple habits can keep your LVP looking good longer:
- Use door mats: Especially at back doors where grit and small stones get tracked in and scratched across the floor.
- Protect furniture legs: Add felt pads to chairs, tables, and anything that’s regularly moved.
- Avoid dragging heavy items: Lift or use sliders when moving appliances or furniture.
- Keep pet nails trimmed: Helps prevent surface scratching in high-traffic areas.
- Stick to safe cleaners: Use manufacturer-recommended products; harsh chemicals can dull the wear layer and make flaws more noticeable.
Common DIY Mistakes to Avoid
If you’re tempted to tackle a repair yourself, here are a few pitfalls we see all the time:
- Using wood putty or caulk on LVP: They’re not designed for flexible vinyl and often discolor or crack quickly.
- Prying aggressively on plank edges: This can snap locking tabs on neighboring boards, leading to gaps or movement.
- Skipping expansion gaps: Reinstalling planks too tight to the wall or door track can cause buckling later.
- Mixing brands or thicknesses: Even a small difference can create a lip you trip over or see in the light.
What to Expect When We Come Out
When we scheduled Frank’s visit, we told him exactly what we’ll tell you:
- We’ll inspect the damaged area in person and confirm whether a full plank replacement is the best solution.
- We’ll let you know how many boards we recommend having on hand — sometimes replacing one means we advise you to have a spare or two just in case.
- We’ll explain which method we’ll use (unlocking from an edge or a surgical cut-and-replace) and how long it should take.
- Once the work is done, we’ll walk the area with you to make sure you’re happy with the look and feel.
If you’re staring at a chipped LVP plank that a filler just won’t hide anymore, you’re not stuck with it. With a couple of spare boards and the right tools and techniques, that “one bad piece” can be replaced cleanly — and your floor can go back to looking like it did on day one.